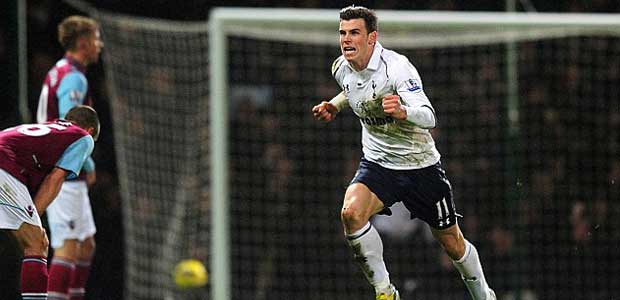
Gareth Bale was the star of the show and naturally took the headlines for his two goals, but Tottenham showed plenty of desire as a team to turn this one around. Andre Villas-Boas also made two key substitutions that swung the game, as it finished West Ham 2 Spurs 3 at the Boleyn Ground.
West Ham set up and tactics
Sam Allardyce usually sends his team out in a 4-2-3-1 with Mark Noble alongside Mohammad Diame in the pivot. Without Noble, he opted to bring in Gary O’Neil and play a 4-3-3 with him as the deepest player and Diame/Nolan (then Taylor) ahead in an inverted triangle. Due to Joe Cole and Matt Jarvis playing shallow in the wide positions, without the ball, the Hammers often looked in a 4-1-4-1 formation, as O’Neil occupied the space between the lines.
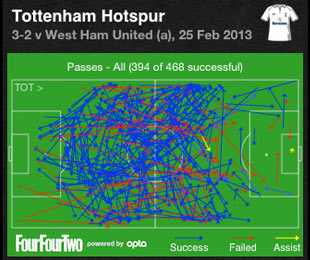
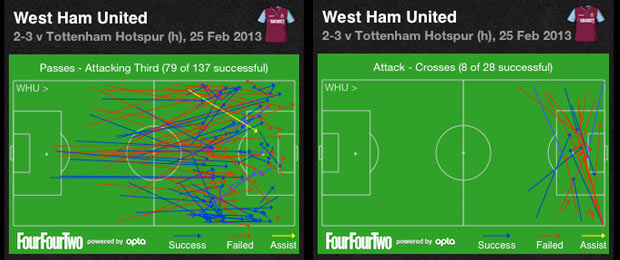
The effect that this had was to keep Spurs from going through the centre and gave us trouble getting in to advanced areas of the pitch. Although we had 62% possession in the match, we only attempted 92 passes in the final third, compared to West Ham’s 137 from just 38% of the ball.
In possession, the Hammers were very quick to get it forward. As we looked at in the Tottenham tactics for West Ham vs Spurs, they like to play the long ball to Andy Carroll and work it wide from his knockdowns. From there they are able to cross and this was pretty much their game plan and resulted in both their goals.
Andy Carroll may have opened the scoring from the penalty spot after a rash challenge from Scott Parker, but it all started with a long cross-field ball. The Geordie striker won the header to knock it down for Kevin Nolan, who then tried to spin. The ball came loose back to Carroll and Scott Parker’s lunge took him out, allowing him to convert the resulting spot kick.
The second arrived from a similar long diagonal cross, as Joey O’Brien picked out Joe Cole cutting in behind our backline. Jan Vertonghen’s hesitation was fatal and gave Cole enough time to scuff his shot across Hugo Lloris.
Spurs set up and tactics
As expected in the Tottenham tactics, Andre Villas-Boas moved Jan Vertonghen to left back in order to get his three best aerial defenders in the team.
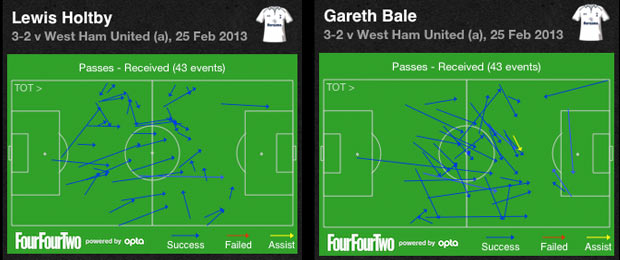
Ahead of them Scott Parker and Moussa Dembele occupied their usual roles in our 4-3-3, but Gareth Bale played centrally once more, as did Lewis Holtby. The German was retreating in to a left-sided position without the ball, but in possession he would come in to the middle and look to influence the play from there. The two being central would have a major impact on our first goal, as we’ll look at in a minute.
As looked at in the Tottenham tactics before the game, West Ham have conceded the majority of chances against them through the centre of their defence. So, whilst this had the effect of getting more players in to the middle when we had the ball against their triangle, it also left Jan Vertonghen to get up and down the line with no one in front of him.
AVB makes two key subs, Allardyce a bad one
Having Lewis Holtby coming inside got more players in to central zones, but it was also hampering us getting the ball wide to stretch the West Ham triangle in the centre.
Andre Villas-Boas recognised this and made two key substitutions.
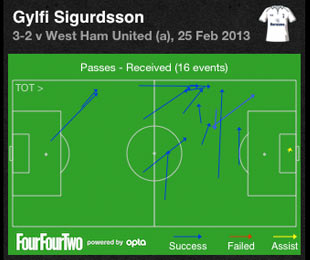
The first was to remove Lewis Holtby for Gylfi Sigurdsson and instruct the Icelander to play in from wide on the left. This immediately gave Jan Vertonghen a better out ball and shortly afterwards Sigurdsson had a shot pushed on to the post by Jussi Jaaskelainen in the West Ham goal.
The second move was to take off Moussa Dembele, who was on a yellow card, and replace him with Tom Carroll. Although this took off a player who was in danger of being sent off, it also allowed us to get a passer further up the pitch.
Dembele likes to drive forward with the ball from deep, whereas Carroll is more of a number 10 who plays further up and makes short, neat, intelligent passes.
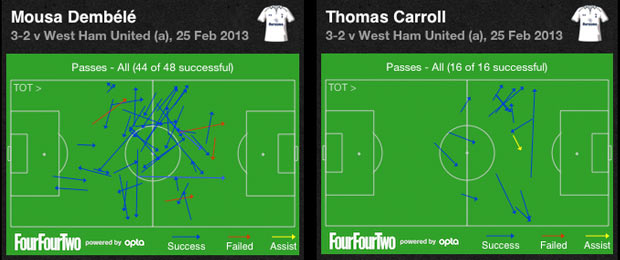
He arrived just before we levelled the scores at 2-2, but was heavily involved in continually moving the ball wide now that we had Sigurdsson in a left sided role. It was apt that the two subs recovered the loose ball and recycled it to Bale for his winner, as we’ll see in a minute.
Whilst Andre Villas-Boas made two good moves to introduce width and a facilitator, Sam Allardyce made a curious decision to remove Guy Demel for Emanuel Pogatetz.
Demel was the focus of attention now Spurs had introduced Sigurdsson down the left, but to switch Joey O’Brien and bring on Pogatetz didn’t seem to be the move to make.
Within four minutes of coming on, Pogatetz was roasted by Gareth Bale and gave away the free-kick that resulted in Sigurdsson scoring the equaliser.
Gareth Bale defeats the West Ham triangle, twice
In amongst all of the sub plots, the West Ham triangle in midfield was the major factor fuelling the game. Spurs were restricted by it, creating our best chances from corners, set pieces and long range efforts. However, Gareth Bale managed to defeat it on two occasions, early in the game and late.
With just 12 minutes on the clock, Bale opened the scoring and it was from a nice move to get in-behind Gary O’Neil and in front of the two centre backs.
O’Neil got caught ball-watching and lost Bale who had darted in behind him. With Lewis Holtby also in the same zone, Winston Reid and James Collins didn’t know whether to come or sit.

Moussa Dembele played the ball in to Adebayor, but Demel got a foot in, knocking it square in to the path of Bale, who now found himself in space between the lines. Lewis Holtby’s presence makes it difficult for Winston Reid to come out, as Bale could flick the ball for him in to the space behind.

Bale, with still plenty to do, then dribbled to his left and fired across Jaaskelainen in to the corner of the net.
After the opener, the midfield triangle deployed by West Ham was effective for much of the match. However, AVB’s two substitutions and also our high amounts of possession meant it became fatigued from chasing the ball and stretched to breaking point, causing the winner.
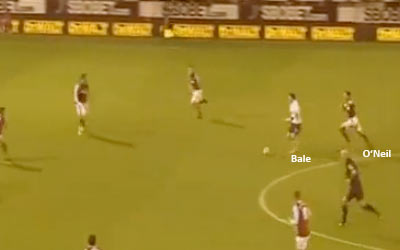
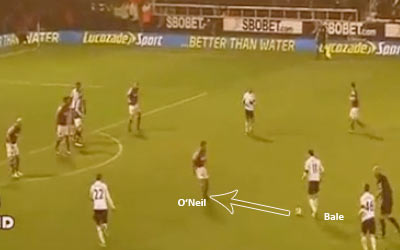
Gary O’Neil was caught up field trying to shadow Bale and the Welshman was able to let the ball cross his body and then drive forward past him in to acres of space.
First Winston Reid came to challenge him, then Joey O’Brien dumped him on the floor, but Gylfi Sigurdsson picked up the ball from his role on the left. The Icelander then recycled play to Tom Carroll who was operating much further up the pitch than Moussa Dembele.
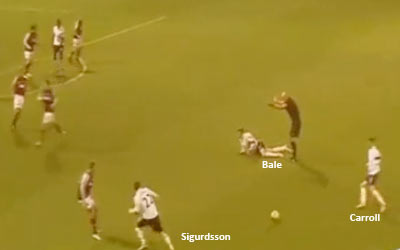
Carroll’s short, neat pass allowed Bale to now match up one-on-one with an exhausted O’Neil who had chased him back moments earlier. Whereas before he may have been tight to Bale, a fatigued O’Neil left too much space and the rest was pure class.
The West Ham fans were giving him stick and this was the best way to answer. Game over.
West Ham 2 Spurs 3 conclusions
There were a number of under-lying factors to this one, but the over-riding one was the West Ham midfield triangle trying to stop us through the middle.
For the most part it worked, restricting us to chances from outside the box and set pieces prior to AVB’s two substitutions. Steven Caulker could have scored with numerous headers from corners and Emmanuel Adebayor should have scored when just 5 yards out with Jaaskelainen stranded on the floor. If either of them had taken their chances, then this would have been a much different game.
At 2-2 we pushed on with Tom Carroll playing high up the pitch facilitaing play from left to right, as a desire to win took over.
“We could have easily dropped the lines back and tried to hold onto the point, because that’s always a positive result away from home in the Premier League, but the lads wanted more. We kept pushing and we got the reward we deserved by winning the game.”
Hugo Lloris was also excellent, racing off his line to clear and making key catches as West Ham went long ball. His charge and save on Matt Taylor was a big moment at 1-2 and kept us in it, allowing Gareth Bale to be the star of the show once more, as it finished West Ham 2 Spurs 3.
[poll id=”34″]